Easy Murrine
![]()
This may sound tougher than it is. It's really quite easy. Take a clear rod. I like to use a 7 or 8 mm one. Anything larger is just a bit too much to handle. I prefer to use Lauscha glass for the punties because it doesn't seem to crack and dump the whole thing on your work surface halfway through. I work on a hothead so you may have to make some minor changes to these directions (no pun intended....or maybe it was).
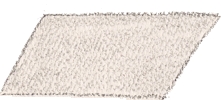
Heat up a large gather and push it against your marver creating a flat surface. This will be your working surface.
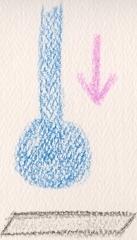
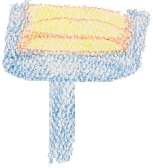
Now your rod should like like the one to the left. This step is optional, but highly recommended. Take a color rod that changes color in the heat, like yellow or red. paint a stripe along one side as shown. The purpose of this stripe is to show you when an area of the rod is losing too much heat. Try to remember to keep 3 or 4 inches at the end of the rod hot. Failure to do so will cause the rod to crack and it may fall off. If this happens, pick it up with a pair of pliers and, using the flame, weld the two parts back together. As you're working on your Murini, don't forget to check the stripe every now and again to see if you need to add heat to the rod.
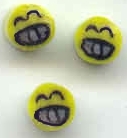
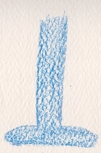
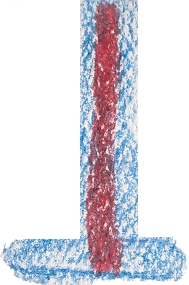
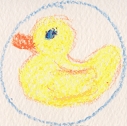
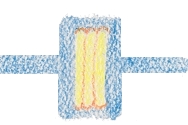
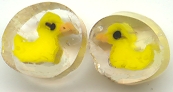
Now turn your rod so that the flat surface is facing you. Using stringer, paint a simple pattern/design on your working surface. You can use a pick or other sculpting tools to help push the hot glass where you want it to go. This painting/layer should be no more than the thickness of a commercial stringer. If there is no clear background as part of your Murini (like in the smiley faces above), make sure your color covers the entire working surface to the edges and that it goes all the way through the layer (more important when working on second and third layers. If there is a clear background (like in the duck or fish below), include the clear area in your painting. Once you have this completed, do it again, and then again. You're aiming for your painting to be about 1/4 to 1/3 inch thick. If your working surface begins to sag in any area, use your marver or sculpting tools to push it back into shape. Your rod should now look fairly similar to this. Now look across the top and see if there are any low areas. If there are, fill them in so that everything across the top is fairly even. With a second clear rod, put a layer of clear on the top, then build up a cone area and position the rod to act as a punty.
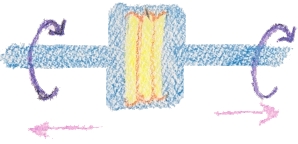
The center area between the two rods should now look something like this. Once the second rod has set into position, start twirling and heating the center mass till it is fairly hot. Walk your mass along your marver, pushing down slightly - twirling it and pulling gently outward as you do. What you're trying to do is decrease the diameter of the center mass while elongating it. Heat up the center mass and do it again, as many times as it takes to make the painted area almost 1/2 an inch thick. Be sure when turning the rods that you keep the entire unit together as one so you won't create twists in the hot glass. Now you're ready to heat the center mass again and pull slowly out making a Murini rod.
Congratulations! You've now made a Murrine. Now that I've shown you mine, how about you show me yours?

Links to other methods for creating Murrine:
- How to Make a Murrine Cane Video By Verena at http://www.glasperlenwerk.at
- Corina Tetringer's Tutorial on how she makes Murrine
You can contact Kitty by emailing her at kay@listen-up.org
© 2002-2023 - Kay R Powell. All rights reserved.