This is not a tutorial on making a treasure necklace. The Viking Answer Lady has a very good one if that's what you're looking for. This is about how and why I did what I did. All Pictures are clickable.
Viking Treasure Necklace
This is not a tutorial on making a treasure necklace. The Viking Answer Lady has a very good one if that's what you're looking for. This is about how and why I did what I did. All Pictures are clickable.
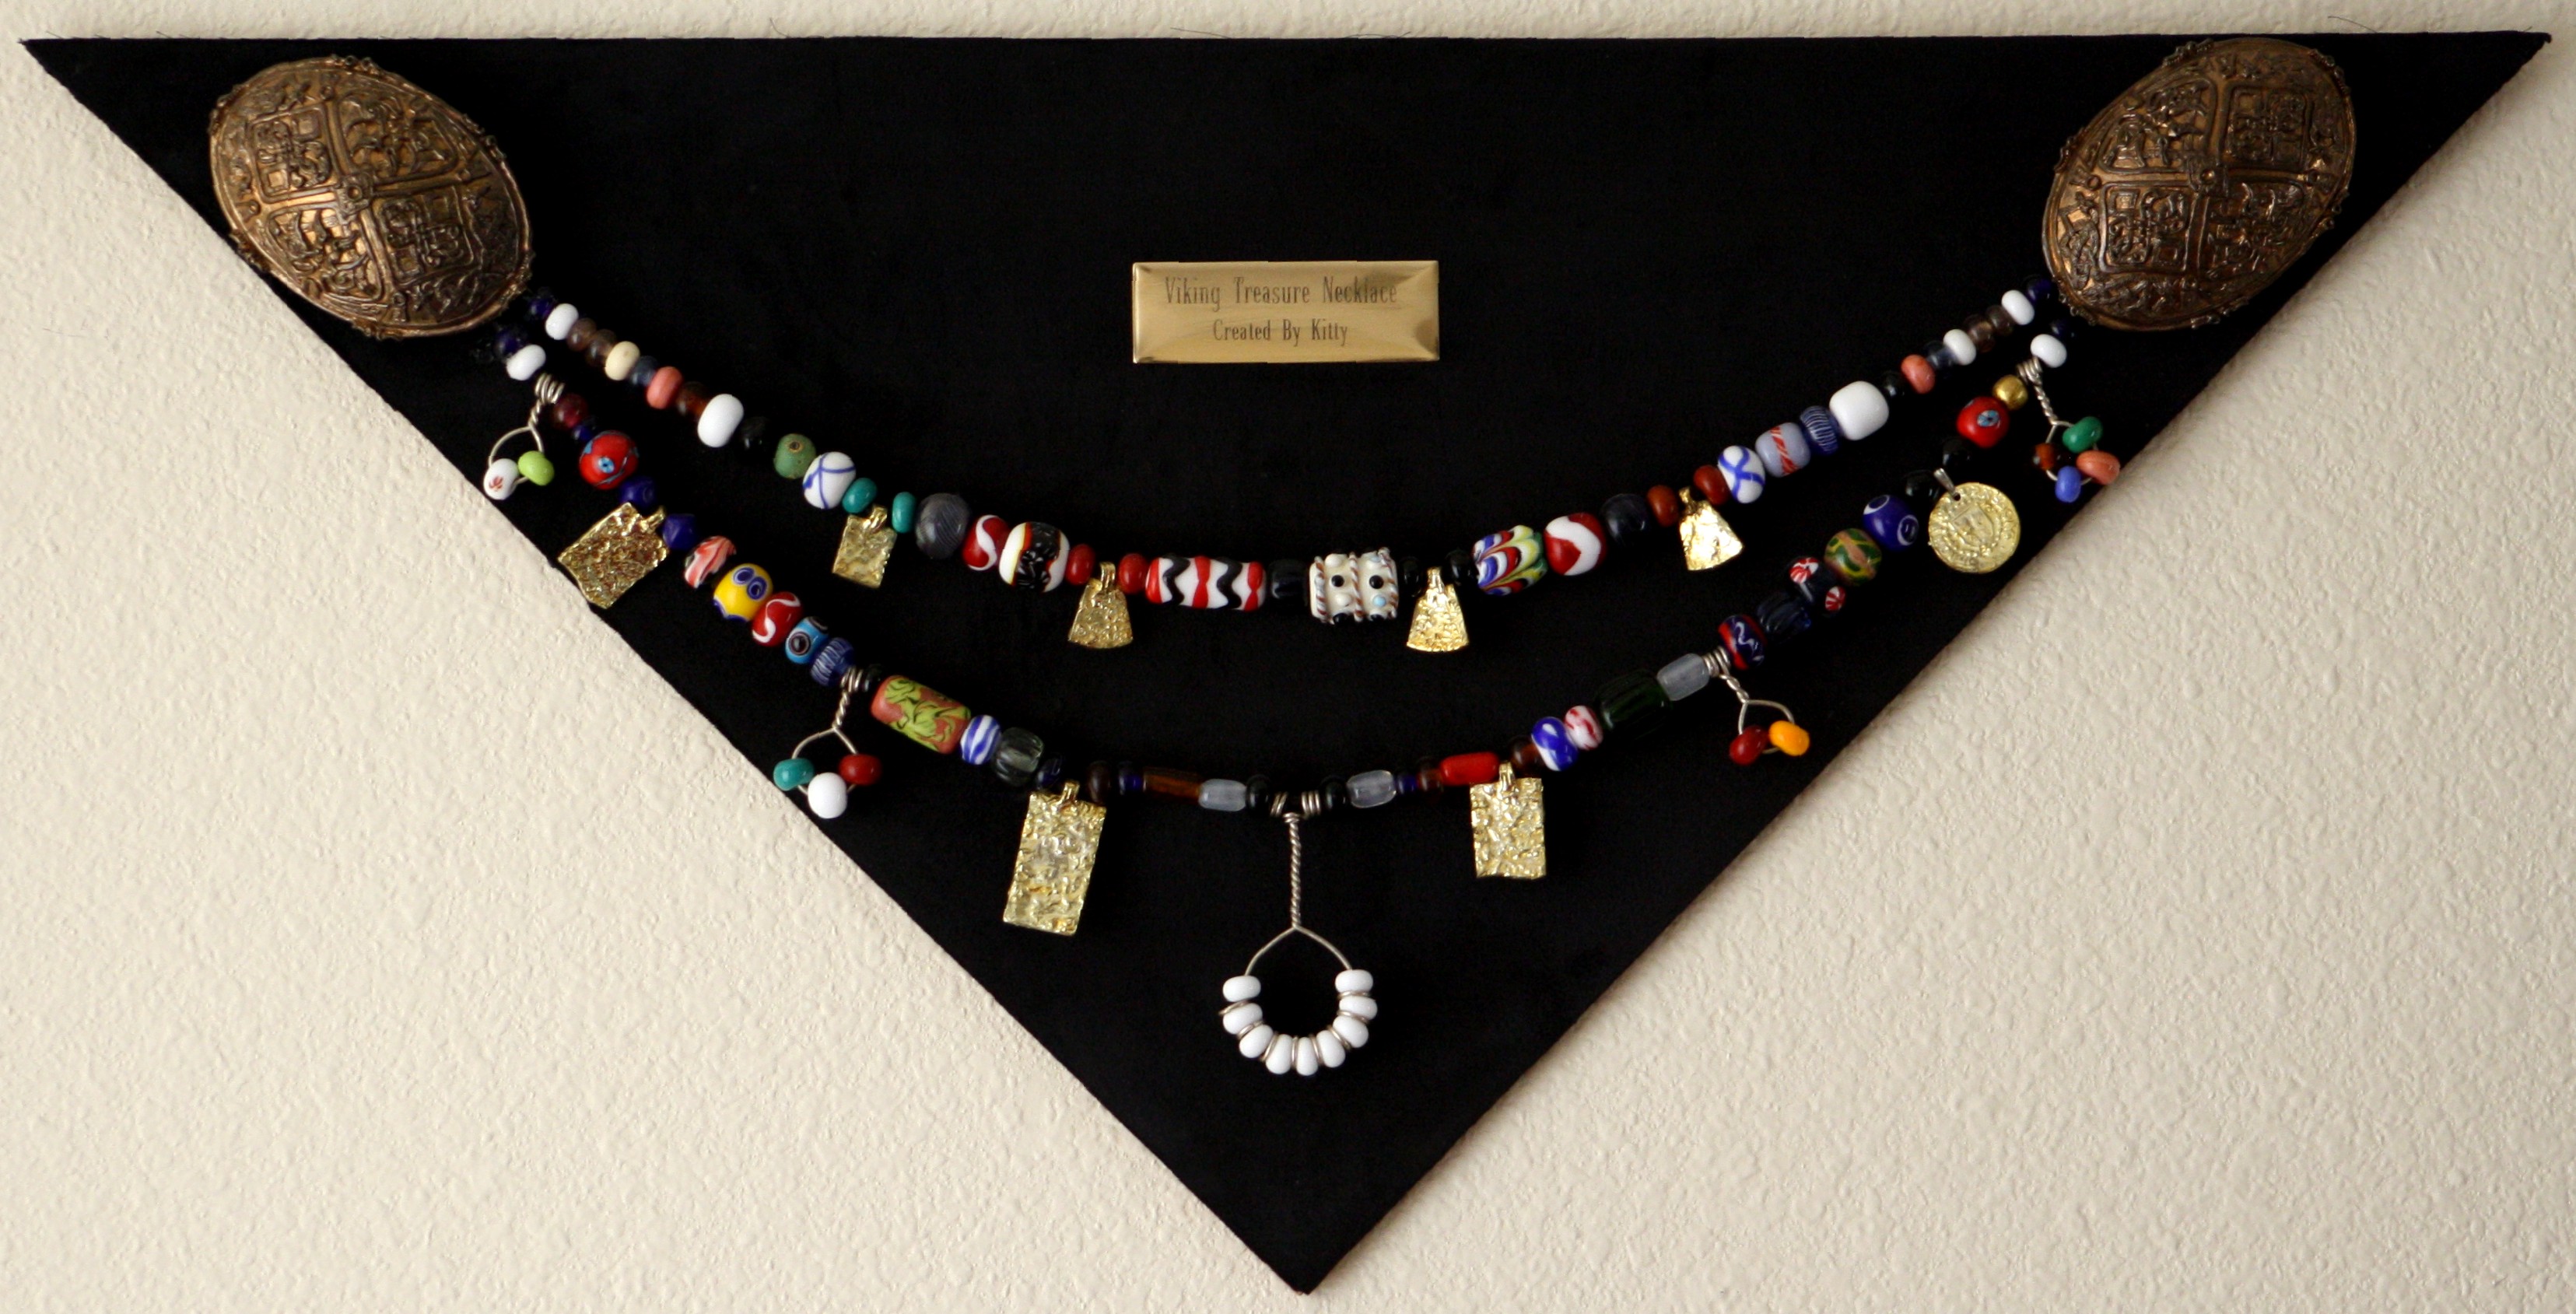
| To see the above necklace in detail, just click on it. | ||
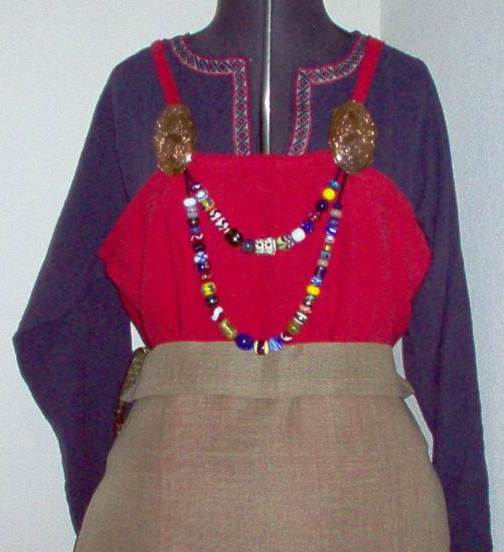
| For those who are unfamiliar with Viking Treasure Necklaces, they are not worn as necklaces are traditionally worn. The broaches are attached to each of the shoulder straps on a Viking Woman's Dress such as is pictured here with an earlier version of this necklace. |
|
|
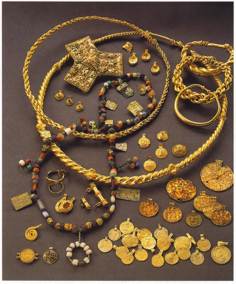
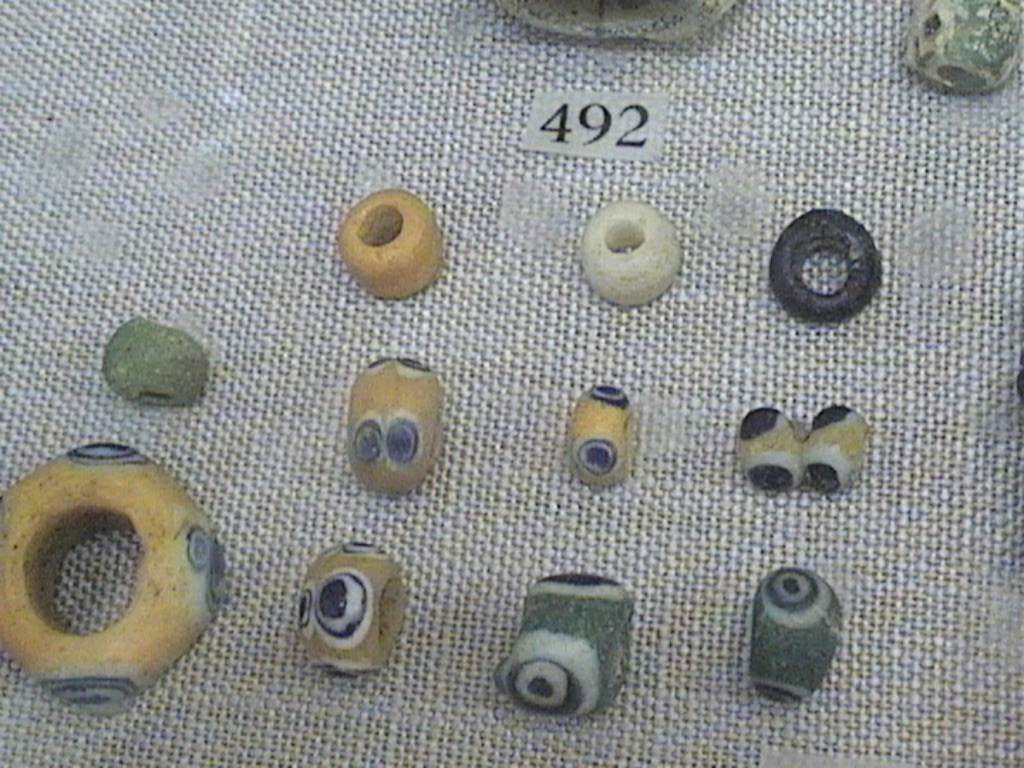
| OK, so just what is it I set out to make? What I first envisioned was an exact replica of a necklace found in the Hon Hoard in Norway as pictured on page 120 of the North Atlantic Saga |
|
|
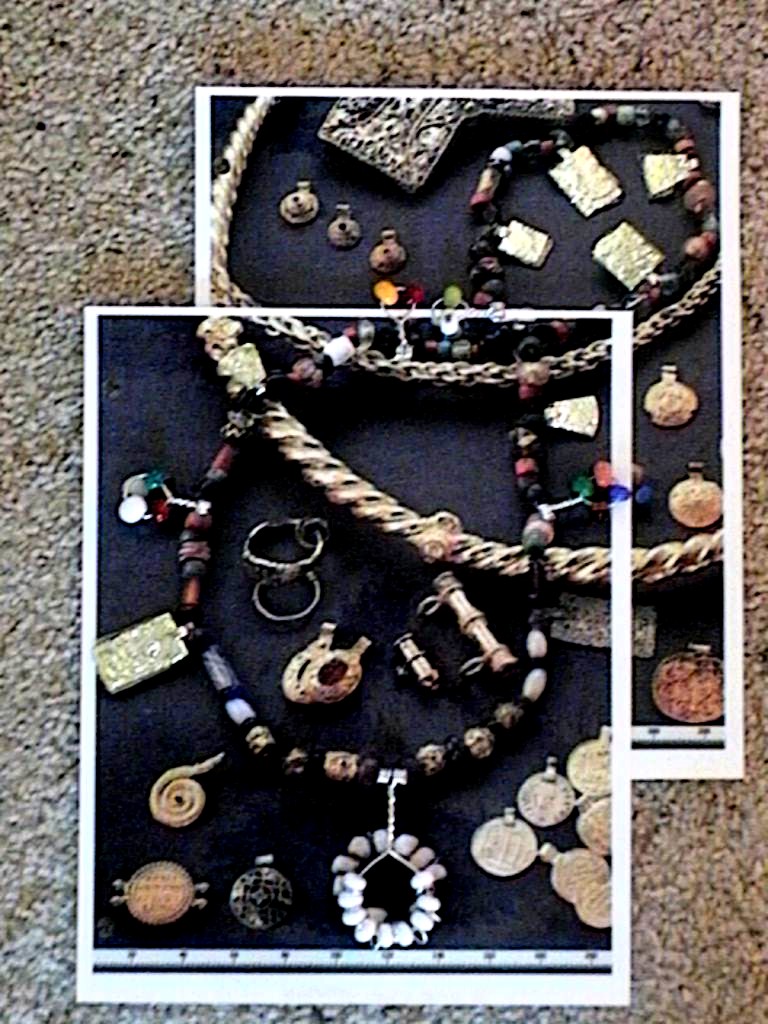
| Since I started out to make an exact
replica, I printed out a life-sized picture of the necklace while
cropping out distractions. Return to the Second Treasure Necklace if you're visiting from that page. |
|
|
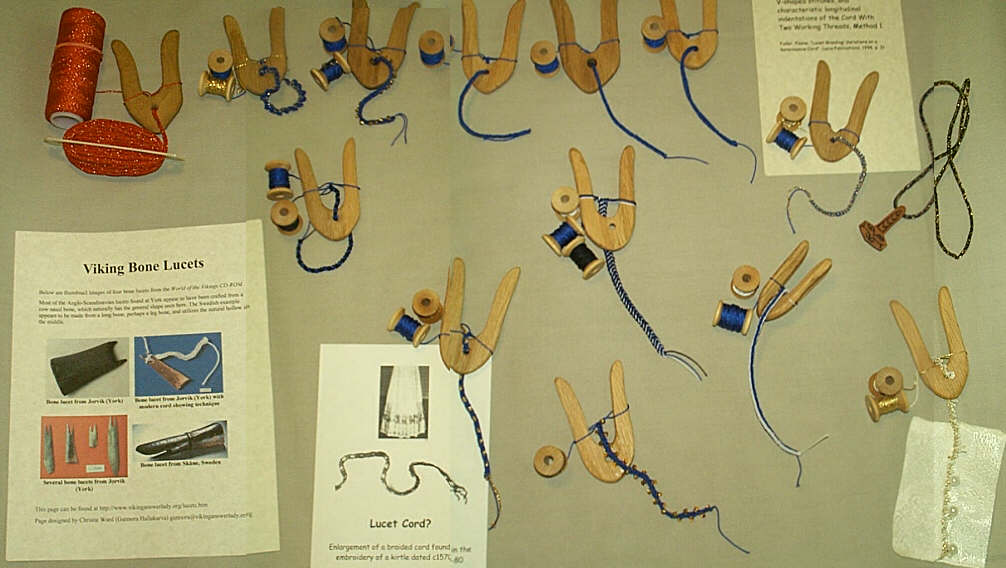
| What to put it on? I love to lucet and know from experience that a luceted silk cord is just the right size to string beads made on a 3/38" mandrel. Careful measurement of references for Viking Beads shows that a hole this size is not out of the question. All I had to do was to measure the picture above for the length. |
|
|
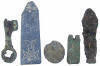
| The first hurdle was to figure out the little metal tabs I saw hanging on the necklace. Hmmm.....after much research it turns out they are pieces of book hinges and coins. |
|
|
| I could do this using Precious Metal Clay. The pattern on top could be easily carved in in before firing, right? Wrong! That stuff was hard as a rock after it dried. 3 times I tried. Now what? I couldn't have just a plain tab, so how to get some sort of pattern on top. Could it be replicated using a technique I had seen on a porcelain doll when I was about 5? I remember my grandmother telling me that they had dipped lace in thinned clay (slip) and used that on the doll. Would this work with PMC? Guess who was going to try it out! |
|
|
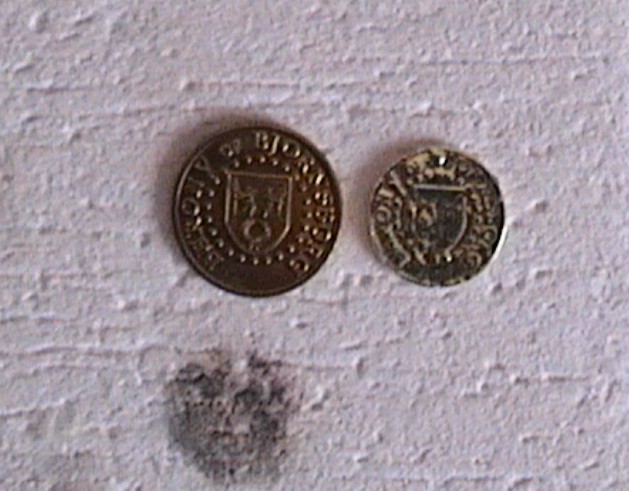
| For the coin, I took a coin that our SCA group had made and given out. I just pressed the clay against the coin. I show both the original and the PMC coin in this picture is to show how much shrinkage there is in after firing. |
|
|
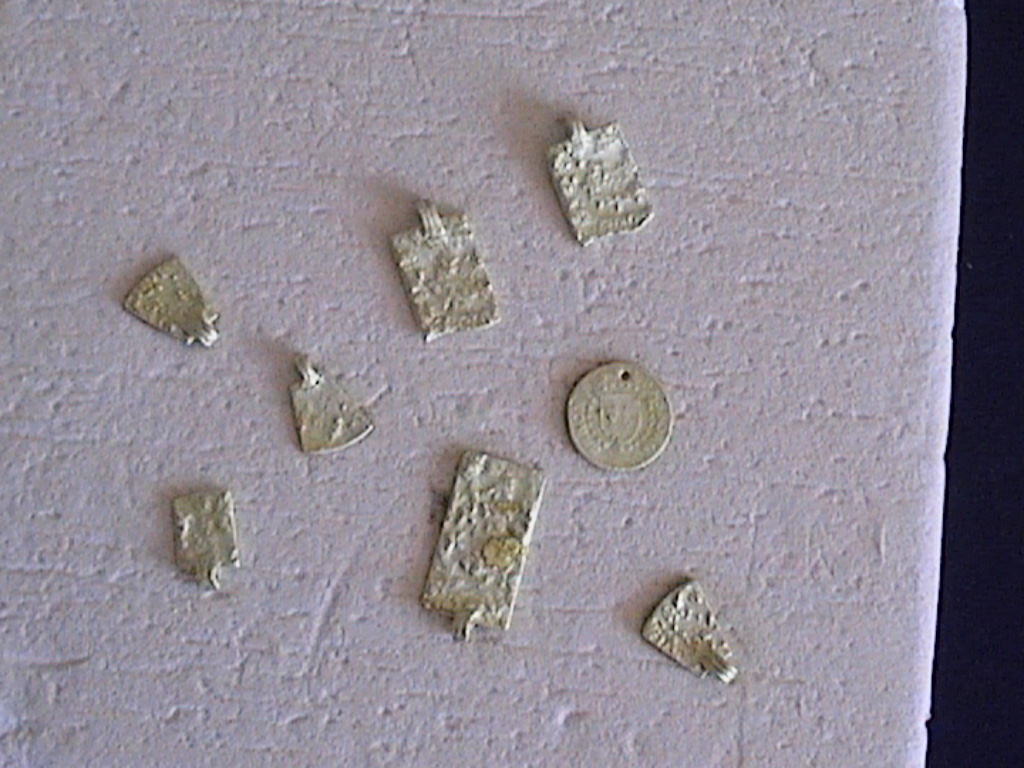
| After I fired the tabs and coin in my kiln, I painted on a layer of PMC Gold and fired it again. I could hardly see any gold at all so I did another coat and firing. Still couldn't see any gold so I did it yet again. This would have to be good enough. Here they are right out of the kiln. I think this was after the first coat of gold. Finishing them only requires a quick going over with a steel brush and a trip through the tumbler with steel shot. |
|
|
| The next part, the wire work with spacers and hand made jump rings was really quite easy. Jump rings you say? Yep, I almost missed them too until I looked carefully at the picture I enlarged earlier for reference. |
|
|
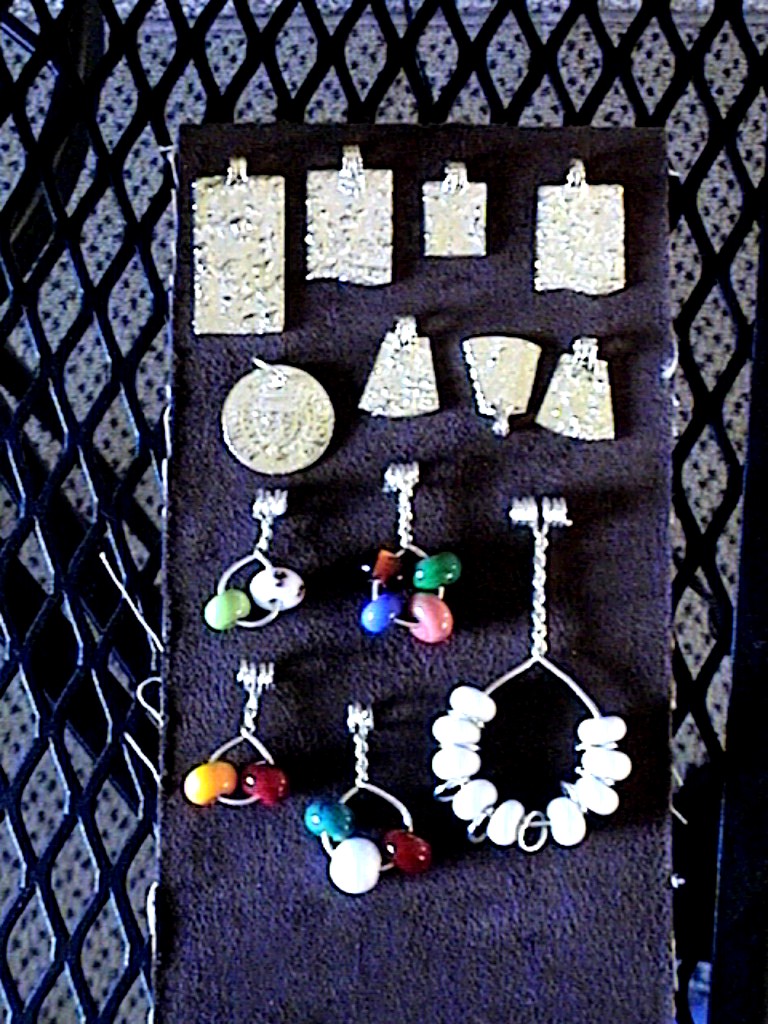
| Here are all the add on parts ready for assembly. |
|
|
| Now it's for the rest of the beads. I'm measuring and planning....and oh my gosh, the rest of the beads are so plain. Just almost like little spacers and not much else. Nothing at all like the beautiful beads I have been researching and trying to make. That is when my plan changed. I would make the necklace they way it could have been made, with beads that we know they had access to, not just the plain little beads in the picture. Oh my gosh, now I have to practice each type of bead till I can perfect it. This could take forever! |
|
|
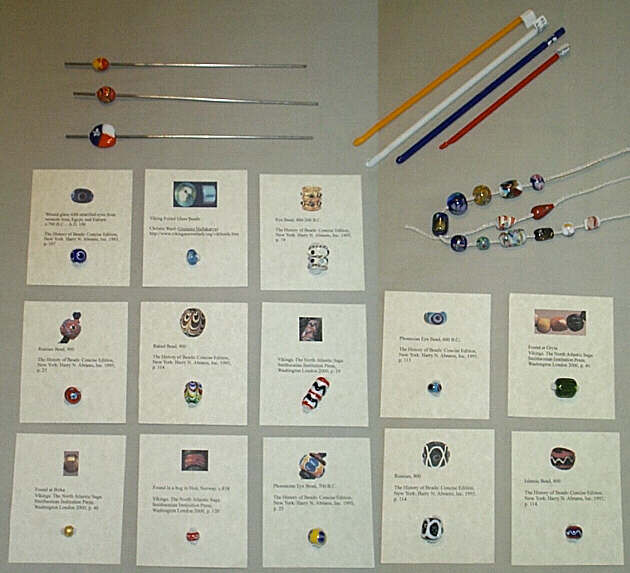
| I think my biggest learning moment was when someone at Pennsic pointed out to me that the beads of this period in time were not "perfect". I'm not sure I really believed this for fact till I visited The Bead Museum in Washington, D.C. and got to see the beads firsthand. As I looked at the beads, I noticed the obvious imperfections and realized that what I was trying to make in my mind wasn't what actually was. |
|
|
| From this came the revelation that the first beads I've made, which had merely been practice beads really were good enough to be used in my necklace, especially since they got an honorable mention at an Arts competition. Using these beads made this necklace double meaningful for me. What a bonus! |
|
|
| So there you have it. It is truly a treasured necklace and will be forever - as these necklaces were meant to be. If you click on the picture to enlarge it, you can see how nifty the lace on the PMC turned out. | ||
![]()
If you're looking for some Bead Separators (which I had not heard of till recently, you might want to check out this PeraParis on Etsy. That's where I just bought some from.
![]()
Take me to the Beads from the Past page
You can contact Kitty by emailing her at kay@listen-up.org
© 2002-2022 - Kay R Powell. All rights reserved.