Viking Treasure Necklace 2
This is not a tutorial on making a treasure necklace. The Viking Answer Lady has a very good one if that's what you're looking for. This is about how and why I did what I did as I replicated this necklace for the second time. All Pictures on this page are clickable.
This necklace is also based on the one in the Hoen Hoard. For pictures of the Hoen Hoard, visit the Treasure Necklace 1 page. There's also a YouTube video about it. If that doesn't work, try this one.
![]()
The Second Necklace
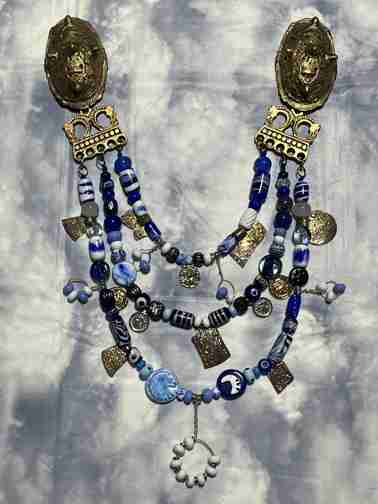
| What prompted me to make a second necklace? A very good friend, Ivar runamagi, asked me to make some Viking Beads for another good friend, Christiana Ivarsdottir. In his mind he asked me to make a few beads for her. In my mind, he asked me to go the whole mile since she plays a Viking Baroness in the SCA group I'm in. The only limitations he put on me was that the beads be blue and white because those are the colors we fly. | |
| It makes sense to me to gather all of the components for my Treasure Necklaces before I actually put it together. First off, what will I put it on, string, cord, wire, What? Lets see, how big is the hole of the beads I'll be using? I've seen the beads I'll be recreating up close and personal at the Bead Museum in Washington DC before it closed in 2004. I took special care to notice the hole sizes. None of them are the little tiny holes you'll find in the stores. They all look to be made from the same mandrel size I usually use so 3/32" is the hole size I will make. I noticed also that it's about the same size as the Lucet Cord that I make. | |
| One day when I needed something to hold down the cord I was Luceting, I grabbed a bead to see if it would do that job. The bead fit on the cord with a snug fit. Perfect. Now I can use that observation in 2 ways. I can use it to hold down the cord as I'm luceting it. More importantly, I realized that I could string my beads on it to make these necklaces and also for when I make Paternosters. One of the complaints I had read from recipients of other's beads was that what it's strung on breaks and all the beads go crashing to the floor. When I use the luceted cord, there is no chance of that happening, they stay where they are and yet move around when it's wanted. |  |
| Let me take a step backwards, because I just mentioned a
second love of mine. Luceting. I won't go into why I enjoy it, but I
will go into how I used it to make the cord I used. I make my own lucets
one if 2 ways. I either 3D print them if I'm making them to give out
from a pattern I designed myself, or
I cut it out of Cherry wood because it's a strong wood and I love the
coloring of it. I cut the shape out with a band saw, sand
the edges till they're velvet smooth, and then coat them in Tung Oil 3-5
times. If you see me using a wooden lucet, that's it's history. . |
| I luceted 3 cords to the length I wanted them. Next I needed to consider the other add ons that are not beads. Lets do the little strangely shaped do-dads. I've read in some of my research that the hinges from fancy bibles that had been broken off were used, as were coins and other little treasures they found. They just put a strap on it and then can hang it on the necklace. How did I make them? The ones on the first necklace that I did, I wasn't really happy with. I used Polymer Metal Clay that had recently become available to the consumer, but it was so stiff that I couldn't really carve a pattern into it. I wasn't really happy with the results so I did something that I had rememberd that my grandmother telling me about. She had a little figureine on her mantle that impressed me. It was covered in lace and looked like it was made of the porcalin, but having worked in clay, I couldn't imagine how this was done. I know that my mother had taken porcelain classes so maybe she or my grandma would know. They told me that they took lace netting and dipped it in watered down clay (called slip), put it on the porcelain and adjusted it till it was how they wanted it, dried it, and fired that. The lace would burn out leaving only the porcelain so that's what I did. |
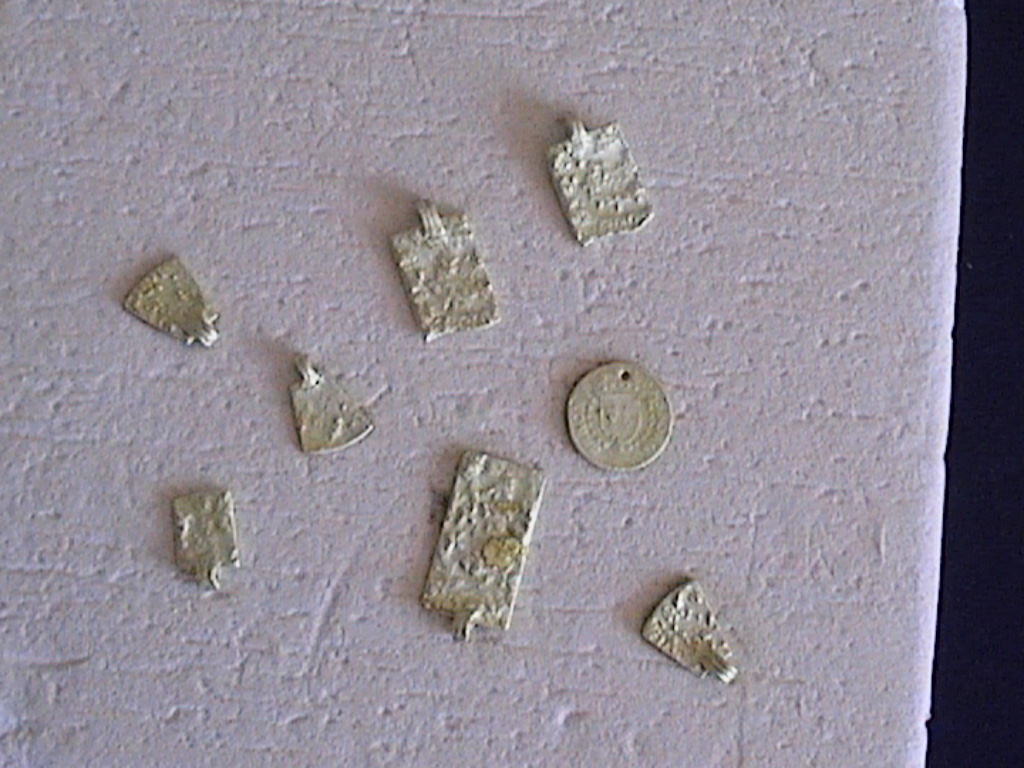 |
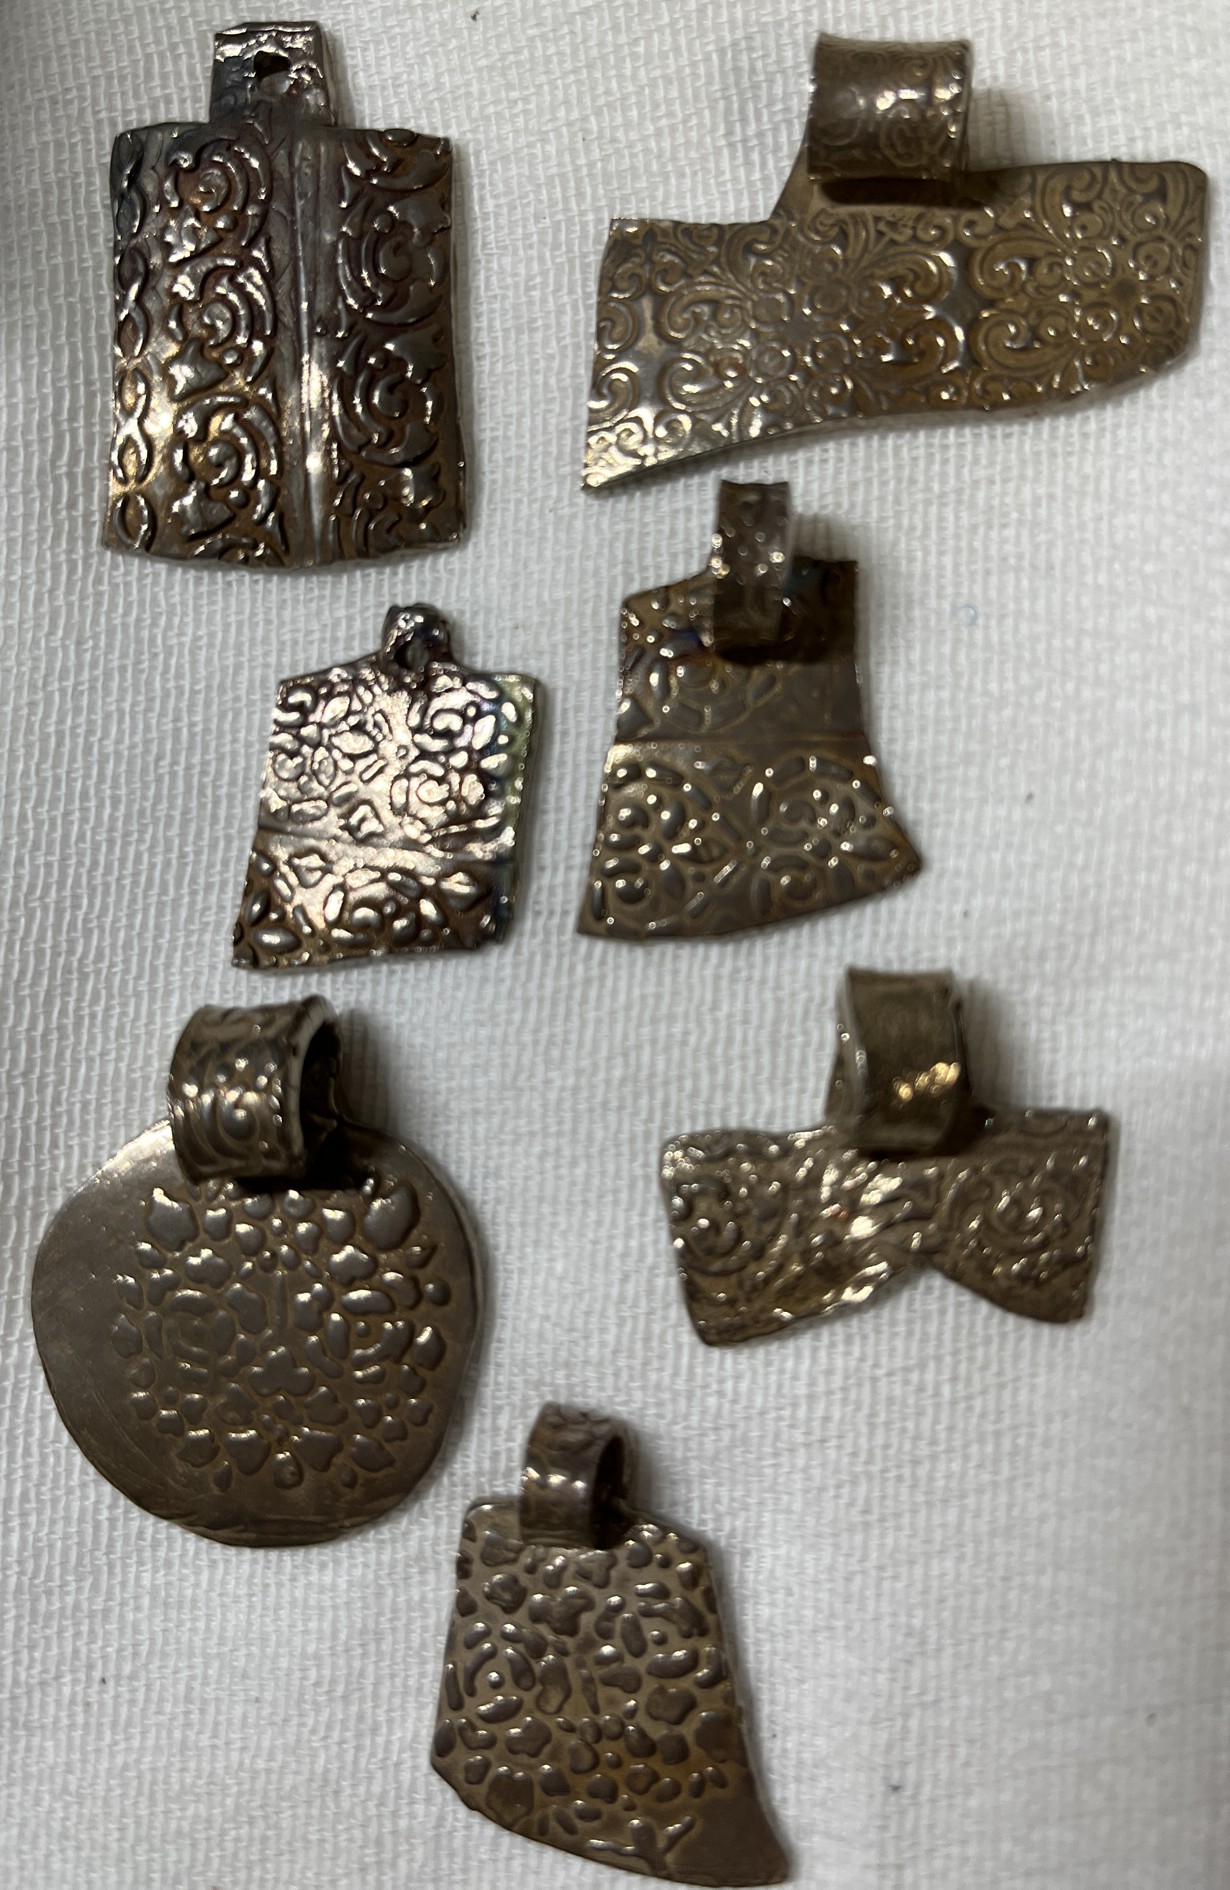
| Many things are improved with time so 15 years later when I made this second necklace, the clay was much more workable. The first time I had used a Silver Clay, and this time I used a While Copper Clay that I had received as a sample. It was greatly more workable and when I pressed a brass stencil on each piece to get the patterning on it, it worked just how I thought it would. As disapointed as I was the first time around, I was very happy this second time. Don't get me wrong, it wasn't an easy process because this time I had to do sintering and both the container and my kiln were covered in black soot when I was done, but I still love the results. This time around, I am proud of these. |
 |
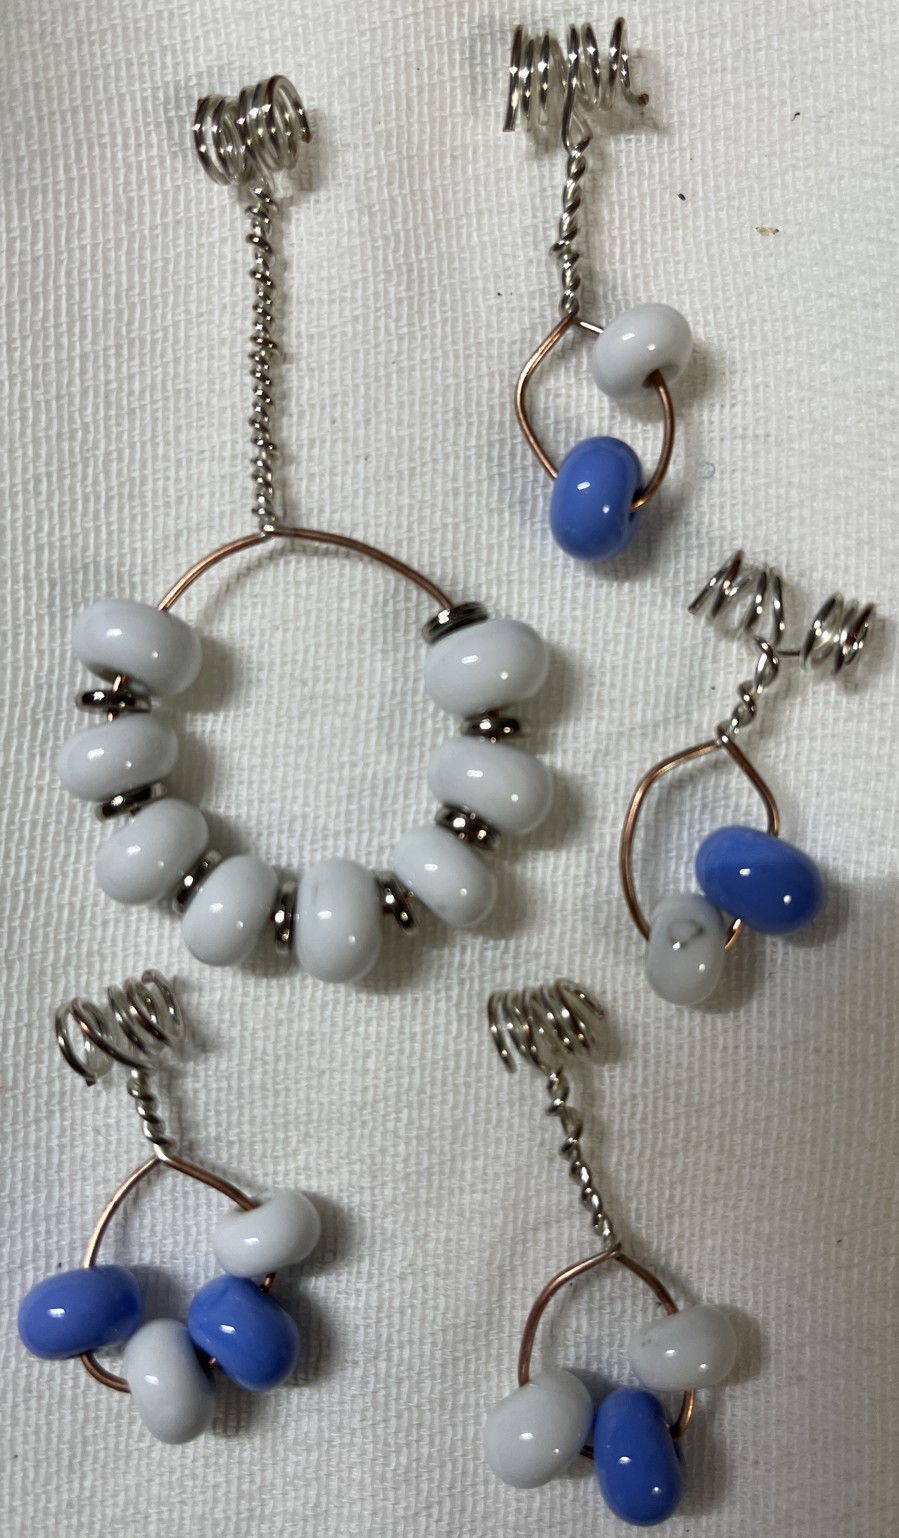
| The next components are the twisted dangles with beads arranged around them, the largest with jumprings between the beads. This was the most problematic for me because I like to get things just so, and the wire just was not cooperating. My huggy showed me how to use a wire drill and my bodyweight to do that twisting and I finally got acceptable results. I wanted to harden the wire so it wouldn't bend as easily thus distorting the shape so I put it in a tumbling machine with steel shot in it and ran that for a while. It worked and so I considered these next components done. Notice how shiney they are? It's because of the tumbling. I also threw the silver tabs into the tumbler with these dangles and shined those up at the same time. |
 |
| The coins came next. Since I wasn't a coin maker myself, and having used up all the copper clay I had, I opted to just purchase them. Charms in the shape of coins are quite plentiful around here so that's what I used. I tip my hat to the coin makers out there. I just didn't have the time or energy to learn another skill at the time. Since I have Multiple Sclerosis, I sometimes have to make allowences for the limitations I have. Could I do it? Do I have the local resources to do it? Someone who can teach me how to do it? The answer to all of these is Yes. I just had to draw some limitations as to how much time this was taking me. | |
| That brings us to the beads, lots of them. I didn't want to rush this process. Making beads always has, and always will be my Zen. It's not a race to me, it's a way to get away from the problelms of the day and tell the head monkey's to settle down. Having studied Viking beads since 2001, the making of the beads was fairly easy. I just did many of the styles I had seen during my studies. I pulled the colors I would be using out of my glass stash, dipped my mandrels in bead release, chose what beads I would make that evening, and did a few beads each day. | |
| There are 2 beads I would like to point out. I decided earlier that this necklace should represent the Barony, so I made 2 very special beads dedicated to that purpose. | |
| Take a look at the bottom strand and you will notice 2 larger beads, just off center. Those are what I'm talking about. The first of those is an Eagle's Head, done to represent and honor the person who founded our fair lands in the SCA. For those of you who know him, his name is Jan. I not only know him, but I'm honored to call him Friend. For this one I used a Brass Bead Press. I used to think using a press or roller was sort of "cheating", but when I went to a Museum that had a display of Egyptian Beads, I noticed that they used both for their "Seals". So much for these not being a period practice. Anyway, I used some powdered enamel on the surface of the Eagle to give it some contrast and be easier to see. |
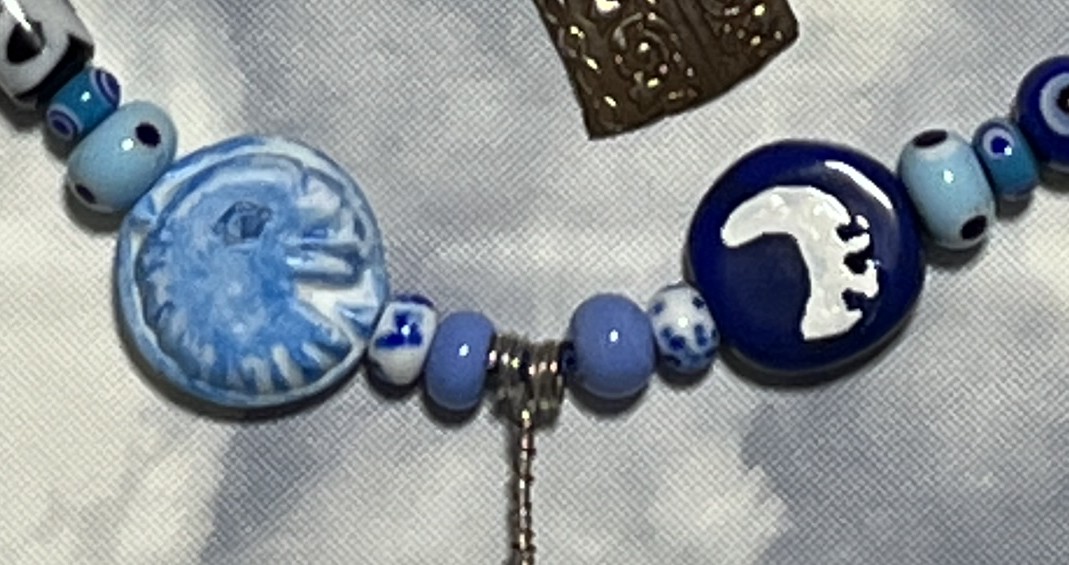 |
| The second bead represents and honors our Baron, who I also call Friend. . He is the same person that requested this necklace and I would have done it for no one else. His arms are a moon with 3 bites taken out of it, on a blue field. I'm not really pleased with my representation, but I was nearing the deadline I gave to myself and I was too tired that night to go any further. Don't get me wrong, it's a good bead, it just doesn't meet my high standards (what my mind saw me as making). | |
| Now it's almost time to put the whole thing together. All we're missing are the bead strand separators and the 2 broaches. I took out the 2 bead separator's I had purchaseed for this project, but I wasn't happy with them. They were way smaller than was pictured in the catalog. Time was almost up so I just started hunting for a 3D file I could buy got it, printed them myself. Turned out pretty good, don't you think? This leaves the Broaches. This was in the middle of the Covid mess and most artisans had sold what they had and till the world opened up again, that was that. I only found 1 pair I could purchase, but the cost was pretty high. I'm not saying it wasn't worth it, but just not what I was prepared to pay. I managed to hunt down a 3D file for a set I liked, bought it and printed them as well. Not what I really wanted, but sometimes you just have to make concessions. | |
| So I put it all together and was quite pleased with the results, better than what I had expected. When it was given to our Baroness, she cried. It's always nice when someone shows they appreciate the effort you put into making their gift. | |
| There's one other thing I want to mention here, because I sure wish someone would have told me this way earlier than they did, it's how to wear the beads comfortably so that your back doesn't start aching, or the weight of the beads doesn't pull your clothes down. Get yourself a sport bra and a couple of split rings about 1 to1.5 in size. Wind one onto each strap of the bra. When you're getting dressed that day, put on the bra and your Viking dress. Look at where you want your broaches to lay, I generally want it just where the strap meets the dress. Pin them in making sure that you pierce the strap, the underdress and through the ring and then reverse this as you poke the clasp out the other side. Close the clasp.Doing it this way keeps the broaches close to your chest preventing them from swinging as you walk. It also prevents the heavy beads from pulling the front of your clothes down. You can now wear your Viking beads all day comfortably and proudly. |
That's pretty much it. If you have any questions I didn't answer please don't hesitate to ask me. I can talk glass all day long if you let me. Have a wonderful afternoon and thanks for stopping by.
Take me to the Treasure Necklace 1 page.
![]()
You can contact Kitty by emailing her at kay@listen-up.org.
© 2002-2023 - Kay R Powell. All rights reserved.